This is Part 2 of the Chrome Developer Tools Series. You can read the other parts here:
Inspecting elements in the DOM tree view
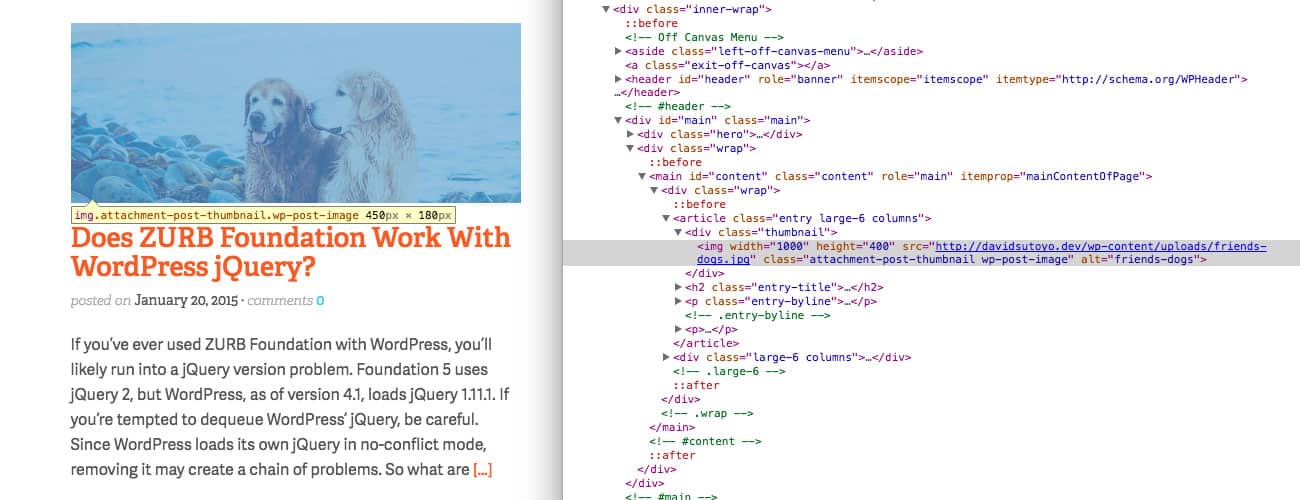
The DOM tree view in the Elements panel of Chrome Developer Tools shows you the HTML structure of the current page. You can navigate the tree much like how you would navigate a folder tree — click on the triangle next to a node and it will expand/collapse the nodes underneath it. When you hover over or click on a particular node Chrome will highlight the corresponding element on the rendered page. This is one way to see which piece of HTML produces the content you are seeing on the page. However, this becomes pretty unwieldy when you have a lot of nodes. There are two other ways to help you find the element you want:
The select tool
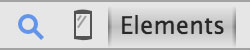
The select tool is the magnifying glass icon you see on the top-left corner of DevTools. Click on the magnifying glass to activate it, and then move your mouse over any element on the page. You will see elements being highlighted as you hover over them. Once you’ve highlighted the element you want, clicking will reveal the HTML element in the DOM tree underneath.
Right-clicking
Another way to reveal the DOM tree is to right-click on an element on the page and selecting “Inspect Element.” The advantage of doing this is that you can do this without Developer Tools open. With one click you can open DevTools and reveal the correct HTML element.
Editing the DOM
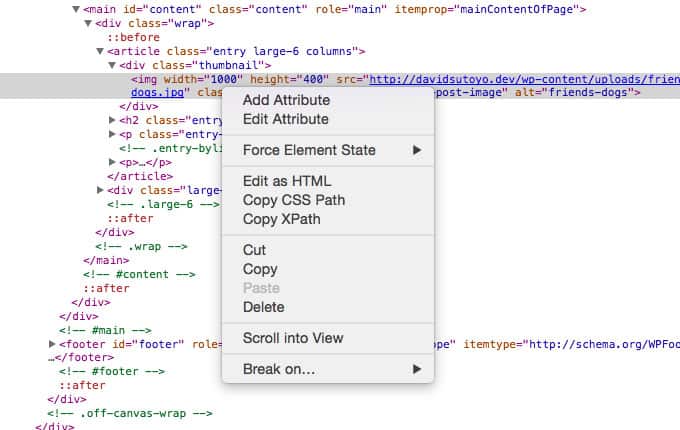
There are quite a few things you can do in the DOM tree view. I’ll highlight the ones accessible through the right-click menu:
Add Attribute
“Add Attribute” allows you to add an attribute to an HTML element. For example, you can add a class attribute to the img tag above by typing class="someclass". Keep in mind that if the element already has a class, then your new class will replace whatever was there.
Edit Attribute
If all you want to do is edit the class name, then “Edit Attribute” is the better choice. Since a given HTML element may have a number of attributes, you’ll have to make sure you right-click on the attribute you want to edit.
Force Element State
“Force Element State” lets you apply mouse states to any HTML element. Your choices include active, hover, focus, and visited. This is most useful when you have to test these states, but can’t keep the mouse on the element — because you need it for DevTools!
Edit HTML
“Edit HTML” allows you to edit the entire HTML element, including all of its HTML children. You’re given free range over all the code to do what you want. It might sound dangerous, but these changes are only local, as with all of the other commands here.
Copy CSS Path
“Copy CSS Path” is useful for getting the CSS selector for that particular element. Since there are many possible CSS paths to a particular element, DevTools usually selects the most direct path, which usually involves IDs. This means these paths aren’t necessarily the most useful path for your stylesheet.
Copy XPath
“Copy XPath” gives you the XPath for your XML document. If you’re just working with HTML/CSS you won’t be needing this.
Cut, Copy, Paste, and Delete
These four commands work pretty much like how you would expect. You can cut, copy, paste, and delete any HTML element along with its children. I’d say the only unexpected behavior is that “Cut” doesn’t actually remove the element until you’ve pasted it.
Scroll into View
“Scroll into View” is useful when you’ve selected an HTML element that has scrolled out of view. Using this command will tell Chrome to scroll back so your highlighted element is visible again.
Break on…
The series of “Break on…” commands are mainly used for JavaScript development, which is beyond the scope of this post.
These DOM manipulation tools are really useful for testing quick changes to your HTML page, but don’t forget that these changes aren’t permanent. They will be undone after you refresh or close the tab.